How to Get Mentioned in AI Search

AI search is changing how content gets discovered online. Tools like Google Search, ChatGPT, Perplexity AI, and Microsoft Copilot are moving beyond classic search result lists. Instead of showing links, they generate answers by synthesizing information from multiple sources. This shift means that traditional SEO — ranking for keywords and earning page views — isn’t the only measure of visibility anymore. You can rank well on page one and still not be cited in AI answers. That’s because AI search tools extract information based on clarity, structure, authority, and contextual relevance. For independent writers and creators, that change brings opportunity and challenge. Opportunity because clear, thoughtful content can be extracted and shared with a wider audience. Challenge because visibility now depends on how confidently an AI system can reference your work. This guide walks you through how to get mentioned in AI search in a way that emphasizes thoughtful writing, real insight, and long-term credibility. What Getting Mentioned in AI Search Really Means When we talk about getting mentioned in AI search, we mean more than ranking well. It means your content is: Cited as a source in AI-generated responses Summarized in a way that includes your ideas Used to answer real user questions directly AI tools don’t just look at keywords or backlinks. They evaluate how useful a piece of content is for answering a specific question. That means context, structure, and authority matter more than ever. Rank Math’s research shows AI systems increasingly prioritize trust signals like reputation, mentions across platforms, and clear topical context rather than pure ranking metrics. This is especially important for independent voices because AI looks for real signals of credibility — not just keyword matches. 1. Write Around Real Questions Readers Ask AI search is built on natural language queries. Users ask full questions like: How can I get my content cited in AI search results? Why isn’t my blog showing up in AI assistant responses? What’s the difference between ranking and being cited by AI? Structure your blog with headings that reflect these real questions. Use H2 and H3 headings that echo what users might type or speak into a search bar. Under each heading, answer directly. AI systems scan for relevance near the top of each section, so honesty and clarity matter. This approach benefits both readers and AI extraction. It makes your content easier to navigate and more likely to be referenced. 2. Define Key Terms Early Writers often enjoy narrative introductions. That’s great for engagement, but AI systems look for clear, extractable facts early in the text. For example: AI search visibility refers to the likelihood that your content will be cited or referenced inside AI-generated answers. That sentence alone can be pulled and used to answer a broader question. Avoid burying definitions deep in the article. Place clear explanations near the beginning of relevant sections so they can be easily extracted. 3. Build Topical Depth, Not Isolated Posts One deep article on AI search may help a little. A cluster of related articles helps a lot. AI systems build patterns. They recognize subject depth when related posts are interlinked and cover multiple angles of the same topic. For example, if you write: A guide on AI search for writers A piece on structuring content for AI extraction A comparison of traditional SEO and AI search visibility A case study of how AI answered a question using your content Internal linking between these posts reinforces topical authority. AI systems interpret that cluster as a signal that your website has comprehensive coverage. That makes it easier for them to cite your work confidently. 4. Use Structured Formatting That Supports Extraction AI tools extract well-organized blocks of text first. These elements increase the likelihood of being cited: Clear H2 and H3 headings Bullet points that break down processes Tables or lists summarizing key points A brief TL;DR at the top or end FAQ sections with precise answers For example, when explaining why your content isn’t cited, you might list the reasons: Lack of clear definitions Weak topical authority Limited external mentions Unstructured format Vague language Lists like this are easy for both humans and AI to scan. 5. Add Specific Data and Verifiable Context Generic statements like “AI search is important” don’t help AI systems extract reliable answers. Specific, verifiable context does. Use real examples, data, or clear comparisons. Quote research where possible. Attribute sources responsibly. For example, instead of saying “AI affects traffic,” you might explain how answer-based search reduces click-through on certain informational queries. That level of detail increases credibility and makes the content more useful as a referenced source. 6. Strengthen Your Credibility Signals AI systems weigh credibility signals heavily. This goes beyond backlinks. It includes: Mentions of your name or brand in other blogs or articles Quotes in expert roundups Active participation in relevant forums and communities Social proof like reviews or endorsements Rank Math’s analysis notes that brand mentions have become a more meaningful trust indicator than pure link counts. For independent writers, this means you can build visibility even without massive domain authority — as long as your name and work are referenced in credible, context-rich settings. Participate in conversations, contribute to publications in your niche, and make your author identity clear and consistent across platforms. 7. Optimize for Natural but Precise Language Writing for AI search doesn’t mean dumbed-down language. It means writing with clarity and intent. Avoid vague generalizations. Be specific. Explain processes step by step. Use real examples when possible. Craft sentences that humans appreciate and AI can parse. Balanced language increases trust and improves both reader experience and AI extraction potential. 8. Include a Focused FAQ Section FAQ sections work well because they mirror genuine user intent. AI systems often pull answers from these blocks when responding to direct questions. Good FAQ practice includes: Addressing real questions users might ask Keeping answers concise and specific Avoiding repetition from earlier sections Using self-contained sentences that make sense alone A strong FAQ
Best Editorial Calendar Tools for a Small Blog Team

In the early days of running a blog, everything feels under control. There are only a few posts in the pipeline. A shared document seems enough. A quick WhatsApp message replaces a status update. Someone says, “I’ll publish it tomorrow,” and everyone trusts that it will happen. Then consistency kicks in. You start publishing regularly. Ideas multiply. Drafts pile up. One post is waiting for edits, another is missing keywords, and someone realizes two writers are working on almost the same topic. Deadlines begin to blur. SEO details get added at the last minute. And suddenly, what once felt simple starts feeling chaotic. This is the point where blogging shifts from a creative hobby to an operational system. And that shift is uncomfortable if you’re not prepared for it. For a blog team of 1 to 10 members, structure isn’t about bureaucracy. It’s about clarity. You don’t need complicated software. You need a tool that keeps everyone aligned without slowing them down. A system that shows what’s planned, what’s in progress, and what’s ready to go live. Before choosing any tool, it’s important to understand why having one changes everything. TL;DR If your blog team is growing and publishing consistently, managing content through chats and shared documents won’t work for long. An editorial calendar tool brings structure, visibility, and accountability to your workflow. It helps track deadlines, avoid duplicate topics, manage SEO details, and keep everyone aligned. The right tool doesn’t need to be complex, it just needs to support consistent publishing without confusion. Why a Tool Is Important for Editorial Calendar Management An editorial calendar tool brings structure to your content process. Without one, planning often lives in scattered emails, chat messages, and memory. That works for a short time. But once publishing becomes consistent, confusion follows. A tool centralizes everything in one place, including topics, deadlines, ownership, and status. Everyone can see what’s being written, what’s under review, and what’s ready to publish. That visibility reduces delays and prevents duplicated effort. It also strengthens accountability. When each post has a clear owner and a defined deadline, responsibility becomes visible. A proper tool makes it easier to track progress, manage revisions, and avoid last-minute stress. For blog teams that care about SEO, it helps ensure keywords, metadata, and internal links aren’t forgotten. Over time, this consistency improves quality and builds authority. A tool doesn’t replace discipline, but it supports it. And for any team that wants reliable publishing, that structure makes a real difference. A proper tool gives you: A centralized publishing schedule Clear ownership of each blog post Visibility into draft, edit, and publish stages Keyword and SEO tracking Better deadline discipline Reduced communication gaps In small teams, confusion spreads quickly because everyone handles multiple roles. A writer may also edit. An editor may also upload to WordPress. Without a structured system, small misses turn into bigger delays. Now let’s look at the top tools for blog-only teams and break down detailed advantages and disadvantages. 1. Notion Notion works well for blog teams that want flexibility and control. You can build a custom editorial calendar with fields for keywords, publish dates, authors, and status updates. It allows you to keep briefs, outlines, and drafts in one place. For small teams that like organizing content their own way, it offers a clean and adaptable structure. It does require discipline to keep everything organized. Advantages Fully customizable databases for blog posts Multiple views including calendar, Kanban, and list Can store content briefs, outlines, and drafts in one place Custom SEO fields such as focus keyword, meta title, internal links Easy collaboration with comments and mentions Affordable for small teams Works well for both planning and documentation Clean interface once structured properly Disadvantages Requires careful setup at the beginning No built-in advanced analytics for performance tracking Can become cluttered if naming conventions are inconsistent Large databases may slow down Limited automation compared to advanced project tools Notion works best when someone on the team maintains structure. 2. Trello Trello uses a simple board system.Trello is ideal for blog teams that prefer a visual workflow. Each blog post moves across columns such as Idea, Draft, Review, and Published. It’s simple to learn and easy to maintain. For teams that don’t want complex dashboards or setup time, Trello keeps things straightforward. However, it may feel limited if you need detailed SEO tracking. Advantages Extremely easy to learn Visual workflow using drag-and-drop cards Quick onboarding for new team members Clear status tracking at a glance Lightweight and not overwhelming Integration options through Power-Ups Good for teams that prefer visual progress tracking Disadvantages Limited SEO field customization unless upgraded No deep reporting or performance dashboards Can feel cluttered as blog volume increases Less suitable for detailed documentation storage Not ideal for managing multiple content categories at scale Trello is strong for straightforward blog workflows without complex requirements. 3. ClickUp ClickUp suits blog teams that are growing and need more structure. It allows custom fields for SEO, clear task ownership, and timeline views. If your blog involves multiple writers, editors, and strict deadlines, ClickUp gives stronger workflow control. It can feel complex at first, but it offers scalability if your content operation expands. Advantages Multiple views including calendar, list, and timeline Custom fields for SEO tracking Task dependencies for structured workflows Built-in documentation Automation options for reminders and status changes Strong reporting dashboards Scales well as blog output increases Workload view for managing writer capacity Disadvantages Steeper learning curve Interface can feel overwhelming for small teams Setup takes time and planning Too many features for very simple blog workflows Paid plans required for advanced features ClickUp suits blog teams closer to 8–10 members who need more control. 4. Asana Asana is helpful when deadlines and accountability are priorities. It clearly assigns tasks and tracks progress through timelines and milestones. For blog teams that follow structured approval processes, it keeps responsibilities visible. While it isn’t built specifically for long-form draft storage, it works well for managing
Common Mistakes to Avoid While Writing TL;DR
Readers today have short attention spans. They skim, scroll, and look for quick takeaways. That’s why TL;DR (Too Long; Didn’t Read) has become essential in blogs, newsletters, and even LinkedIn posts. A well-written TL;DR can pull readers in and help them grasp the main points without reading every word. But many writers get it wrong. A poorly crafted TL;DR can confuse readers or turn them away. If you’re new to the concept, you may want to read my earlier post on how to write a TL;DR before diving into the common mistakes people make. TL;DR (Why You Should Read) Keep it short and clear. Highlight the key takeaways, not the fluff. Use bullets or short sentences for easy scanning. Don’t add new points that aren’t in the article. Always place it where readers can see it. Top 10 Common Mistakes To Avoid Making It Too Long A TL;DR should act like a snapshot, not a second article. If it runs into paragraphs, it defeats its purpose. Limit it to three to five bullets or a short paragraph. The goal is clarity, not coverage. Being Too Vague Saying “This article is about writing better TL;DRs” isn’t useful. A TL;DR should summarize the main ideas. Think of it as answering: What will the reader walk away with? Avoid vague lines and focus on the specific lessons your article provides. Ignoring Structure Walls of text discourage readers. TL;DRs should be easy to scan. Use bullet points or crisp one-liners. Each point should stand on its own. For example, instead of “Summaries need clarity and keywords,” write: Keep sentences short. Use keywords naturally. 4. Leaving Out Key Points Some writers summarize only the introduction or conclusion, missing the middle. A good TL;DR should capture the most important insights across the whole article, not just one section. Overloading With Details Numbers, quotes, or side stories belong in the main article. The TL;DR is about the big picture. Don’t crowd it with examples or data. Focus on what matters most. Adding New Information Never use the TL;DR to sneak in new arguments, facts, or promotions. Readers expect a summary of what they’ve just read, not fresh material. Stick to what’s already in the post. Skipping Keywords If you’re writing for blogs, keywords matter. Forgetting them in your TL;DR is a missed chance to rank higher in search results. That’s why writers who understand why TL;DR in content is so powerful always pay attention to how it supports visibility as well as readability. Using Jargon Avoid industry-heavy terms or buzzwords that confuse readers. A TL;DR should be simple and accessible. Write it as if you’re explaining it to a friend who’s new to the topic. Forgetting the Reader Some TL;DRs read like notes for the writer. That’s not the goal. Always think: What would a new reader need to know in 30 seconds? Make the summary for them, not for you. Placing It in the Wrong Spot A TL;DR hidden at the end of the article often goes unread. Place it right after the opening paragraph, where readers can see it early. That way, they know what to expect and whether they want to read further. To Sum Up A TL;DR is a promise to your reader: “Here’s what you’ll gain without spending too much time.” If you keep it short, clear, and focused, it will build trust and encourage more people to read the full piece. Avoid the common mistakes—too long, too vague, or poorly placed—and your TL;DR will do what it’s meant to: make content easier to understand. And remember, a TL;DR isn’t just for articles. It’s tied to how you approach what is a blog in the first place. If your blog exists to serve readers, the summary should always honor their time. Key Takeaways TL;DRs work best when short, clear, and structured. Avoid vague summaries, jargon, or unnecessary details. Always reflect the article’s main points, not just one section. Use keywords to support SEO and SGE readiness. Position the TL;DR where it’s visible, ideally at the start. Quick FAQs Q1. How long should a TL;DR be? A TL;DR should be short—ideally three to five bullet points or a short paragraph. Q2. Where should I place a TL;DR in an article? Place it right after the introduction. Readers should see it before they decide whether to continue reading. Q3. Should I use keywords in a TL;DR? Yes. Keywords help your summary rank better and match search intent, but use them naturally. Q4. Can I use TL;DRs on social media? Absolutely. TL;DRs work well for LinkedIn, X, and Threads posts, where readers prefer quick takeaways. Q5. What’s the biggest mistake writers make with TL;DRs? The most common mistake is making it too long or too vague, which defeats the purpose.
How to Write a TL;DR
Most people don’t read every word on a page. According to the Nielsen Norman Group, users typically read only 20–28% of the text during an average visit. Add to this the reality that mobile readers scroll even faster, and you can see why summaries matter. A TL;DR (Too Long; Didn’t Read) gives readers the gist of your content in seconds. It keeps busy professionals from bouncing away and signals search engines that your article is structured, clear, and helpful. In the age of AI-powered search results and Google’s SGE (Search Generative Experience), TL;DRs have become even more powerful. They help your content get picked up for answer boxes, voice search, and AI-generated snippets. If you want your content to rank and resonate, you need a TL;DR that does more than summarize. It should hook readers, highlight value, and improve your visibility in search. Here are 10 practical tips on how to write a TL;DR that works for both people and algorithms. TL;DR Tips to Write TL;DR A TL;DR condenses your content into under 100 words. Write it last so it reflects the full piece. Use short sentences or bullets for clarity. Highlight reader value, not every detail. Place it near the top for maximum impact. Add focus keywords naturally for SEO and SGE. Match your article’s tone. Adapt TL;DRs for blogs, social, and reports. Test formats to see what performs better. Treat it as a hook, not an afterthought. Key Takeaways A TL;DR is not optional — it’s essential for both readers with short attention spans and search engines (especially AI-driven ones like Google SGE).Always write it last so it reflects the true essence of your content. Keep it short and direct — under 100 words, ideally 2–3 sentences or 3–5 bullets. Focus on reader value, not details — answer “what’s in it for me?” Use bullets or short sentences to make it scannable. Place the TL;DR near the top of the article, right after the intro. Add your focus keyword naturally for SEO and AI search visibility. Match the tone of your content so it feels consistent. Adapt it for platforms — bullets for blogs, conversational for LinkedIn, one-liners for Threads/X. Test and refine different formats; track engagement and adjust. Treat the TL;DR as a hook and pitch, not an afterthought. 10 Practical Tips to Write TL;DR 1. Write the TL;DR Last You need to understand your content fully before summarizing it. Writing the TL;DR after finishing your piece helps you capture the most important takeaways, not just what you think is important at the start. Think of it as writing the back-cover blurb of a book—you wouldn’t draft it before finishing the story. 2. Keep It Under 100 Words Readers want a quick grasp, not another mini-article. Aim for 2–3 sentences or 3–5 bullet points. Anything longer loses the “instant clarity” effect. On mobile, your TL;DR should fit on one screen without scrolling. Conciseness makes it powerful. 3. Focus on Reader Value Don’t summarize everything. Instead, answer the reader’s main question: What’s in it for me? Highlight the key outcomes, benefits, or lessons. If your blog is about writing productivity, your TL;DR should say, “These tips will help you write faster without losing quality” instead of simply stating that the article “lists productivity tools.” 4. Use Bullets for Clarity Bullets make TL;DRs easy to skim. They also break down points visually, so readers can digest them at a glance. If your article has multiple sections, bullets give structure without overwhelming. For long-form posts, this format is especially effective. 5. Place It at the Top A TL;DR works best right after your introduction. This is where readers decide whether to stay or leave. By placing it near the top, you show respect for their time and increase engagement. Search engines also give weight to summaries that appear early in the text. 6. Add Keywords Naturally For SEO and SGE, weave your focus keyword naturally into the TL;DR. For example, if your post is about how to write a TL;DR, make sure that phrase appears once in the summary. Don’t overstuff; keep it natural and conversational. Keywords here help search engines understand your content quickly. 7. Match the Tone of the Content If your article is casual, your TL;DR should be too. If it’s professional and research-driven, keep it crisp and precise. Consistency builds trust and makes the summary feel like an extension of the article, not a separate add-on. 8. Adapt It for Platforms Not every TL;DR looks the same. On a blog, bullets work well. On LinkedIn, you can expand it into 3–4 conversational sentences. On X (Twitter), shrink it into one sharp one-liner. By tailoring your TL;DR, you make your content reusable across platforms without feeling repetitive. 9. Test Different Formats Experiment with different styles—bullets vs. short paragraphs, one-line vs. multi-sentence. Check your analytics for scroll depth, bounce rate, and engagement. If your TL;DR is doing its job, you’ll see people spending more time on the page and scrolling deeper. If not, refine it until you find what resonates. 10. Treat It as a Hook, Not an Afterthought A TL;DR is more than a summary. It’s a pitch to convince readers your article is worth their time. Don’t tack it on quickly. Spend a few minutes refining it, because it may end up being the most-read part of your piece. Think of it as your first impression—make it count. Quick FAQs Q1. What is a TL;DR in writing? A TL;DR is a short summary that highlights the key points of an article, report, or post. It helps readers get the main message quickly without reading the entire text. Q2. How long should a TL;DR be? A TL;DR should be under 100 words. Keep it to 2–3 sentences or 3–5 bullet points so readers can understand it in seconds. Q3. Where should I place a TL;DR in a blog? Place your TL;DR near the top, usually after the introduction. This helps readers decide whether they want to
TL;DR in Content: How to Engage Readers and Rank Better
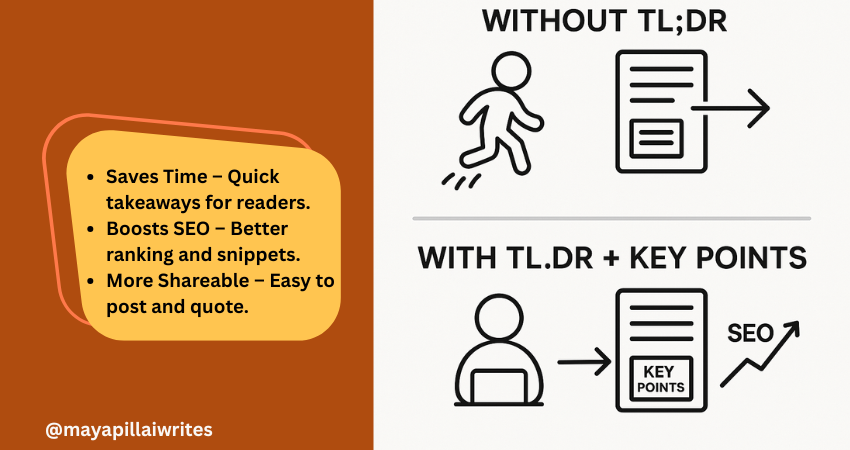
Including a TL;DR in content is no longer optional. Readers skim, AI search engines summarize, and attention spans keep shrinking. A TL;DR(Too Long; Didn’t Read) gives a quick summary that respects your readers’ time and makes your blog easier for AI tools and Google’s Search Generative Experience (SGE) to surface. But a TL;DR alone isn’t enough. Adding Key Points beneath it ensures that both skimmers and detail-seekers get value. In an era where AI decides what parts of your content get shown, these two elements can set your blog/article apart. TL; DR A TL;DR in content is a short summary that captures your article’s main idea. It helps readers, AI tools, and search engines understand your blog quickly. Key Points expand on the TL;DR with detailed highlights, giving both readers and AI more context. Using both together improves readability, SEO performance, AI search visibility, and builds trust with your audience. Key Takeaways A TL;DR isn’t just a convenience — it’s a strategic tool that improves both user experience and how AI-driven search engines interpret your content. Key Points aren’t filler; they strengthen SEO by adding structure, making your blog more likely to rank for related queries and appear in featured snippets. Pairing TL;DR and Key Points bridges the gap between human readers and AI systems, ensuring content is engaging, scannable, and machine-readable at the same time. In long-form blogs, Key Points can double as jump links for better navigation, which is especially important for mobile readers. Respecting reader time with a TL;DR and guiding them with Key Points ultimately builds trust and authority, which pays off in both engagement and search rankings. What is TL;DR in Content? TL;DR is a short summary that captures the core message of your article. Usually placed right after the introduction, it helps readers and AI tools quickly understand what the content is about. Why it’s important now: Readers want speed Most online readers don’t have the patience to go through long paragraphs before deciding if something is worth their time. A TL;DR gives them the headline takeaways immediately, allowing them to judge whether to continue reading. Without it, you risk losing them before they get to your key message. AI favors clarity Search engines and AI-powered tools are built to pick up well-structured summaries. A TL;DR written in simple, direct language makes it easier for these systems to surface your blog in snippets, SGE cards, and chat-based search results. This increases your visibility without extra effort. Boosts visibility Blogs with a TL;DR have a higher chance of being featured in “People Also Ask” boxes or summary snippets. Search engines look for clear, condensed content they can repurpose quickly, and a TL;DR is ready-made for that. Improves shareability Readers who find value in your TL;DR are more likely to copy it into a LinkedIn post, share it in a newsletter, or use it as a quote in their own content. This creates organic backlinks and visibility for your blog. Voice search ready Voice assistants like Alexa and Google Assistant prefer short, straightforward answers. A TL;DR formatted in 2–3 sentences naturally fits the length of a spoken response, which makes your blog more discoverable in voice search results. Mobile-first reading On small screens, people scroll faster and often skim through headlines only. Having a TL;DR upfront ensures your blog’s value is captured in the first screen view, even if the reader doesn’t scroll further. Trust-building By offering a summary upfront, you show readers you respect their time. It also signals confidence in your content — you’re not hiding the main message in walls of text. This creates trust and makes readers more likely to return to your blog. Supports accessibility Not all readers consume content the same way. For people with attention difficulties or those using screen readers, a TL;DR provides a simple entry point that ensures they still get value from your writing. What are Key Points? Key Points are a set of bulleted highlights that expand slightly beyond a TL;DR. While TL;DR gives the big picture, Key Points provide a roadmap of what’s inside the article. Why they’re valuable in the AI era: Act as signposts Many readers jump around instead of reading blogs linearly. Key Points act like a table of contents in miniature, showing readers what the article covers. This keeps them on your page longer because they know exactly what to expect. Strengthen SEO Search engines like Google prioritize structured content. Bullet lists with concise explanations often show up in featured snippets and “zero-click” results. By using Key Points, you give your blog multiple chances to rank for related queries, even if the reader never clicks through. Support AI summaries AI-driven platforms, including Google SGE, scan content for structured data they can repurpose. Well-written Key Points make it easier for these systems to understand your blog’s scope and deliver accurate summaries, increasing your chances of being displayed in answer cards. Increase retention When readers see clear Key Points, they know the content is organized. This makes them more likely to stay on your blog and read further. A messy block of text, in contrast, often leads to higher bounce rates. Add clarity for busy readers Some people want more than a one-line TL;DR but don’t have time for the full article. Key Points give them the middle ground: detailed highlights that still save time. It’s a way of serving both casual readers and more serious ones at the same time. Improve content navigation In long-form blogs, Key Points can be turned into clickable jump links. This is especially helpful for mobile readers, who don’t want to keep scrolling endlessly to find one section. It improves usability and keeps them engaged. Build authority Presenting your highlights clearly at the start shows confidence in your insights. It signals that you know your subject well enough to extract the main lessons upfront, which builds trust with both human readers and AI tools. TL;DR vs Key Points: Why You Need Both You might wonder, “If I already
How to Choose a Topic for a Listicle
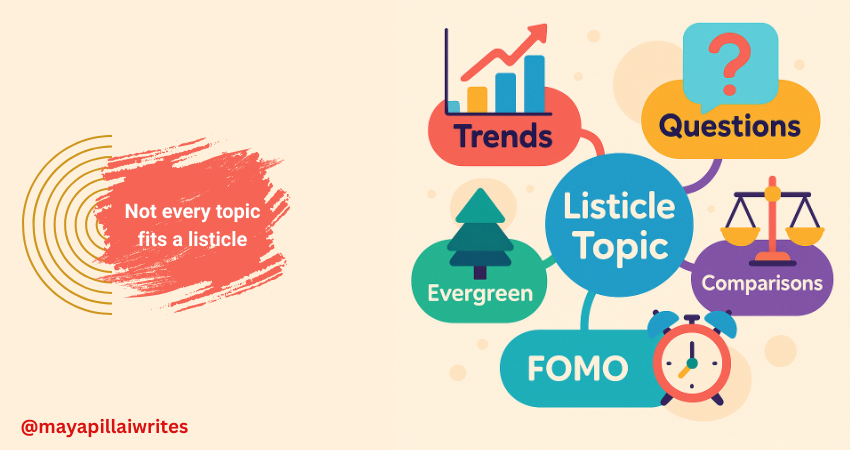
Creating listicles is one of the most effective ways to capture attention online, but not every subject makes sense in a numbered format. If you’ve ever wondered how to choose a topic for a listicle, the key lies in audience demand, search intent, and whether your idea can be broken into clear, valuable points. Listicles remain popular because they’re scannable, shareable, and rank well in search engines. But in 2025, with AI-driven search (Google SGE, ChatGPT results, and voice queries) influencing visibility, writers need smarter ways to pick the right topics. TL; DR The best listicle topics are audience-driven, data-supported, and trend-aware. Choose subjects that can be broken into steps, mistakes, or comparisons, then test them against what people are searching for right now. Titles with numbers, FOMO-driven hooks, or problem-solving angles perform best in search engines and AI summaries. Key Takeaways Great listicle topics are data-driven, trend-aware, and easy to split into points. Audience questions and Google SERPs are the best places to find winning ideas. FOMO-driven, comparison-based, and mobile-first topics perform especially well. Balance evergreen and timely content to maximize reach. Test titles before writing to confirm demand. Read: How Listicles Improve Readability – mayapillaiwrites.com 10 Proven Tips for 2025 1. Start With Real Questions From Your Audience The strongest listicle ideas come directly from what your audience is asking. Instead of brainstorming in isolation, pay attention to recurring questions on platforms like Reddit, Quora, YouTube comments, Slack groups, or niche forums. When the same pain point keeps showing up, that’s your signal. For example, if multiple users are asking “How do I protect my crypto from AI scams?”, that’s a natural fit for a listicle like “7 Ways to Protect Your Crypto From AI-Powered Scams in 2025.” By starting with questions, you guarantee relevance and avoid generic topics that won’t resonate. 2. Spot FOMO Topics (Fear of Missing Out) Readers don’t want to fall behind. That’s why listicles around trends, risks, and new opportunities often get more clicks and shares than evergreen content. In fast-moving industries like cybersecurity, marketing, or AI, people scan listicles to quickly catch up on what’s changing. Example: “10 AI Tools Every Freelancer Should Try in 2025” or “5 Cybersecurity Threats Businesses Aren’t Ready For This Year.” These create urgency, which boosts engagement and SEO performance. 3. Use Search Data, Not Just Intuition It’s tempting to pick listicle topics based on instinct, but SEO thrives on data. Use tools like: Google Trends to spot rising interest. AnswerThePublic to identify long-tail, list-friendly questions. Google Autocomplete to see what phrases like “best,” “top,” and “ways to” bring up in your niche. If the first page of Google shows list-based results for your keyword, it’s proof that the listicle format matches search intent. 4. Ask: Can It Be Broken Into “Chunks”? Not every topic works as a listicle. A strong candidate is one you can break into steps, mistakes, tools, or examples. If the subject can’t be divided neatly, it’s better suited for an essay or thought piece. ✅ Good: “8 Mistakes New Writers Make on LinkedIn.” ❌ Weak: “Why Content Writing Is Important.” Breaking into chunks makes your post easier to skim, which is both reader-friendly and SEO-friendly. 5. Think Mobile-First Over 70% of readers access content on their phones, which means mobile readability is non-negotiable. When choosing a topic, ask: “Would this listicle work as a quick-scroll read?” ✅ Works: “10 Free Grammar Tools Writers Can Use on the Go.” ❌ Doesn’t Work: “History of Grammar Tools.” Scannable, benefit-driven content performs better in mobile-first indexing and AI search summaries. 6. Focus on Comparison and Decision-Making Decision-driven queries are where listicles shine. When people search for “best tools,” “top platforms,” or “alternatives to,” they want a quick comparison before making a choice. Examples: “7 Cold Wallets Compared: Which One Should You Use in 2025?” “5 Freelance Platforms Writers Can Trust This Year.” These listicles help readers act quickly — and Google rewards that with higher rankings. 7. Balance Evergreen and Timely Topics Don’t rely only on trending ideas. A good strategy is to create both: Evergreen listicles stay relevant year after year (“10 Simple Tips to Improve Your Writing”). Timely listicles capture attention fast but may fade (“5 AI Tools Changing Content Creation in 2025”). Balancing both ensures you get immediate visibility + long-term search traffic. 8. Add Your Unique Angle Before You Write The internet is saturated with listicles. What makes yours click-worthy is the angle. Don’t just write “10 Productivity Tools.” Add a differentiator like “Tested by Writers in 2025” or “That Are Actually Free.” Readers — and search engines — reward originality. Unique angles can also earn backlinks from others who cite your work. 9. Test Your Title Early Your title is your hook. Before writing, test it on LinkedIn, Twitter, or even a private Slack group. Post two versions of your headline and see which sparks interest. If “10 SEO Tools for Beginners” gets less traction than “10 SEO Tools That Save Writers Time in 2025”, you know which one to use. This small step ensures your chosen topic has demand. 10. Apply the “Quick Filters” Rule Before finalizing, run every topic through these quick filters: Can it be split into 5–15 clear points? Does it solve a problem or answer a trending question? Is interest rising on Google Trends? Can you frame it with a unique perspective? Would you personally click on this headline? If the answer is yes to most, you’ve found your listicle winner. To Sum Up Choosing the right topic for a listicle in 2025 is about balancing audience needs, search demand, and format suitability. A good listicle topic answers real questions, solves a problem, or helps readers make quick decisions. By focusing on data-driven research (Google Trends, autocomplete, AnswerThePublic), spotting FOMO-driven trends, and ensuring your subject can be broken into clear, scannable points, you’ll create listicles that are both SEO-friendly and reader-friendly. The most successful listicles today combine evergreen relevance with timely hooks, carry unique
Understanding Tone of Voice in UX Writing: The 4 Dimensions Every Writer Needs to Master
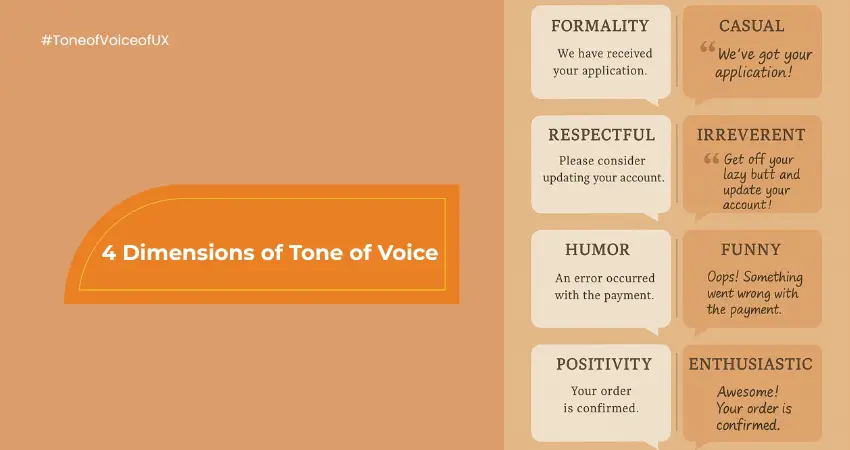
Tone of voice in UX writing is more than just personality—it’s a powerful UX design principle that influences user trust, clarity, and connection. And in an online environment where users are constantly scanning and judging with limited attention spans, tone becomes the invisible bridge between design and human experience. Whether you’re writing a 404 error message, onboarding flow, or chatbot script, your tone of voice determines how the message lands—emotionally and cognitively. This article breaks down the four essential tone of voice dimensions—developed through usability research—and shows how content writers and UX professionals can use them to craft accessible, consistent, and compelling microcopy. Why Tone of Voice in UX Writing Isn’t Optional Anymore Tone of voice is often dismissed as something you sprinkle at the end of the content process. That’s a mistake. Here’s why it deserves a front-row seat in every UX writing strategy: It builds trust. A consistent and relatable tone builds credibility and emotional comfort. It reduces cognitive load. Familiar and human-centred language is easier to process, especially in high-stress moments like error handling or payments. It reflects brand integrity. Your product’s tone should echo your values. If you’re a brand that promotes simplicity and empowerment, your copy should too. It shapes user behavior. Tone can nudge users toward taking action or provide the reassurance they need to continue a task. Tone isn’t an overlay—it’s part of the UX architecture. The 4 Dimensions of Tone of Voice (and How to Use Them) The tone of your writing can be broken down into four sliders or spectrums. These allow teams to visualise, define, and apply voice in a more systemised way. 1. Formal vs Casual Formality sets the tone for how professional or conversational your writing feels. A formal tone is structured, respectful, and restrained. It minimises contractions and slang and is best suited for sensitive, legal, financial, or high-stakes content. A casual tone mirrors everyday speech. It uses contractions and informal phrases. This style humanises the interface and makes it approachable. Deeper Insight: A formal tone may signal authority but can also create distance. A casual tone feels warm but may lose precision. Balance based on the user journey stage. Tip for writers: If you’re writing across multiple touchpoints (e.g., FAQs, landing pages, chat support), define a tone range rather than a single point. Formal: “Your credentials have been verified.” Casual: “All set! You’re good to go.” 2. Funny vs Serious Humour in UX writing is powerful—but it’s not always welcome. A humorous tone introduces playfulness and charm. It’s ideal for light-hearted products, creative industries, or gamified user experiences. A serious tone is neutral, direct, and no-nonsense. It’s crucial during tasks that involve user stress, confusion, or critical data. Deeper Insight: Humour is cultural, contextual, and highly subjective. What works in a Gen Z fintech app may fall flat in an enterprise SaaS dashboard. Tip for writers: Always user-test humour. One misplaced joke can erode brand trust more than a typo. Funny: “Oops! We messed up. We’re fixing it faster than you can say ‘debug’.” Serious: “An unexpected error occurred. Please try again.” 3. Respectful vs Irreverent This dimension speaks to how seriously the brand takes the user’s emotions, expectations, and boundaries. A respectful tone communicates empathy, support, and user-centric thinking. It avoids assumptions, sarcasm, and flippant responses. An irreverent tone is bold, edgy, and sometimes provocative. It deliberately challenges norms to stand out and appeal to a specific, loyal user base. Deeper Insight: This spectrum often aligns with your brand’s broader values. Are you inclusive and careful, or do you want to push boundaries and be noticed? Tip for writers: Irreverence is not the absence of respect—it’s a calculated tone strategy. If you’re targeting niche audiences, irreverence can be magnetic. Respectful: “Would you like to turn on reminders?” Irreverent: “Want us to nag you with helpful reminders? You know you love it.” 4. Enthusiastic vs Matter-of-Fact This spectrum deals with energy—how much enthusiasm or emotional weight your writing carries. Enthusiastic writing radiates positivity and excitement. Use it for moments of achievement, onboarding, or promotions. A matter-of-fact tone is neutral and direct. It’s suitable for documentation, transactions, and backend processes. Deeper Insight: High enthusiasm during error messages can feel tone-deaf. Similarly, a flat tone during user success moments may undercut momentum. Tip for writers: Treat tone like a thermostat. Dial it up during emotionally positive touchpoints; lower it during serious or instructional content. Enthusiastic: “Hooray! You’ve unlocked your next milestone!” Neutral: “Your progress has been updated.” How to Build a Scalable Tone of Voice Strategy Too often, tone is inconsistent because teams write in silos. Here’s how to build a shared framework: Create a Tone of Voice Grid Plot your product’s default tone across the four dimensions. Use examples of what to say and what not to say to build clarity. Map Tone to Journey Stages Define how tone shifts across onboarding, support, transactions, empty states, and celebrations. For example: Onboarding = Casual + Enthusiastic Error message = Formal + Serious CTA = Casual + Confident Use Voice Principles to Train Teams Go beyond do’s and don’ts. Create a tone principle like “We speak like a friendly expert—approachable but precise.” Let this drive how content is shaped. Test, Analyse, Iterate Use tone testing frameworks like pairwise tone comparison, heatmaps, and task completion rates. UX writing is UX. Track how tone affects performance metrics. To Sum Up Tone of voice in UX writing is not the finishing touch—it’s part of the interface. It guides, reassures, persuades, and sometimes even entertains. By understanding and applying the four tone dimensions—formality, humour, respectfulness, and enthusiasm—you build more human-centred, credible, and persuasive experiences. In an era where users are bombarded by apps, notifications, and messages, tone becomes your differentiator.
How to Create Your Unique Brand Voice (Beyond Clichés and Stand Out)

Craft a brand voice that stands out—ditch clichés, embrace authenticity, and break industry norms to make your brand memorable and recognizable.
5 Ways ChatGPT Can Revolutionize Content Writing for Small Businesses and Writers in 2025

Discover how ChatGPT for content creation is transforming the writing landscape for small businesses and writers alike. From generating fresh blog ideas to polishing drafts into perfection, this AI-powered tool saves time, boosts creativity, and delivers professional results. Learn five practical ways ChatGPT can revolutionize your content strategy and help you stay ahead in the competitive world of content marketing.
Caught in the Creative Crossfire: How to Nail Tone and Style Amidst Differing Opinions

Mastering tone and style in copywriting is the secret weapon every writer needs to craft content that resonates, inspires, and commands attention. Picture this: you’re deep in a virtual brainstorming session, where ideas clash like waves in a storm. The designer is pushing for a playful tone, the strategist demands precision and authority, and the client insists on keeping things formal. And then there’s you—the copywriter—standing at the intersection of creativity and strategy, tasked with weaving these divergent visions into a seamless narrative. It’s not just about keeping the peace; it’s about creating something that genuinely connects. If you’ve ever found yourself in this creative crossfire, you’re not alone. The real magic lies in striking that perfect balance—an art that transforms good writing into unforgettable content. Tone and Style: Your Copywriting Superpowers As a copywriter, your words are more than just text on a page—they’re your handshake, your smile, and your voice to the reader. Tone and style are what give those words personality and purpose. They’re your creative superpowers, turning ideas into emotions and emotions into action. Let’s break it down. Tone is how your writing feels. Imagine it as the vibe of a conversation. Are you the supportive friend cheering someone on? The trusted advisor offering calm, steady guidance? Or maybe the witty storyteller making people laugh? Tone is what shapes the emotional connection between you and your audience. It’s why a fitness brand might use a high-energy, encouraging tone to motivate readers, while a healthcare provider leans into a compassionate, reassuring voice to build trust. Style, though, is the craft—it’s how you write. It’s in the rhythm of your sentences, the words you choose, and the way your ideas flow. Think of it as your signature—your creative fingerprint. A conversational style might feel like a chat over coffee: light, natural, and engaging. A formal style, on the other hand, carries authority, precision, and structure, like a keynote speech delivered to professionals. But here’s the truth: tone and style aren’t just tools; they’re how you connect with people. They’re what make your audience pause, think, and feel understood. Imagine this: you’re writing an email for a startup targeting eco-conscious millennials. The tone might be playful, optimistic, and relatable—“Hey there, tree hugger!”—and the style might be short and snappy, like an exciting announcement from a close friend. Now switch gears. You’re crafting a white paper for a cybersecurity firm. The tone shifts to authoritative and insightful, and the style becomes polished and data-driven, showing readers you mean business. See how different that feels? Your tone and style allow you to adapt, like a chameleon, to meet your audience where they are. And when done right, they can: Spark Emotion: The right tone and style make people feel something—joy, trust, curiosity—and that feeling keeps them engaged. Build Trust: When your words match what your audience needs to hear, they feel understood. And trust? It’s the foundation of loyalty. Drive Action: Whether it’s clicking a link, signing up, or sharing your content, tone and style guide your reader toward taking the next step. Here’s the thing: tone and style aren’t just about what you say—they’re about how your words make someone feel. And that feeling is what stays with them long after they’ve closed the tab or scrolled past your post. So, take a moment the next time you sit down to write. Ask yourself, “How do I want my reader to feel when they read this? What’s the experience I want to create?” Because when you answer those questions, you’re not just writing—you’re connecting. And in today’s world, connection is your real superpower. Start with the Human at the Other End Here’s the golden rule of writing compelling content: tone and style are never about you or even the brand—they’re about the human consuming your words. If your audience doesn’t feel understood, they’ll scroll past, click away, or ignore your message entirely. And as copywriters, our superpower lies in stepping into their world and delivering words that feel personal, timely, and valuable. Picture this: you’re writing for a millennial entrepreneur juggling two side hustles. She’s bootstrapping her business, working late nights, and scrolling through advice blogs in her precious moments of downtime. What does she need? Not industry jargon, not vague platitudes, and definitely not a long-winded essay. She needs practical advice in bite-sized, relatable chunks that show you respect her time. Your tone here might be friendly, approachable, and motivational, with a conversational style that feels like talking to a mentor who’s rooting for her success. Now, shift perspectives. You’re writing for a corporate executive. He’s a decision-maker, navigating a high-stakes environment, and what he values most is clarity and precision. He doesn’t want fluff or anecdotes—he wants data-driven insights and actionable takeaways. Your tone becomes polished and confident, while your style leans toward structured, professional, and to the point. Here’s the truth: these are two entirely different audiences, but your job is the same—connect with them on a human level. How Do You Get This Right? Understanding your audience isn’t just about demographics; it’s about empathy. It’s about stepping into their shoes and seeing the world from their perspective. Here’s how to start: 1. Walk in Their Shoes Spend time where your audience spends time. Dive into the forums they frequent, the social media posts they like, and even the memes they share. Their digital footprint tells a story—what makes them laugh, what frustrates them, and what inspires them. If you’re writing for eco-conscious consumers, check out the conversations happening in sustainability groups. If your audience is tech-savvy developers, explore their Reddit threads or GitHub discussions. These spaces reveal their language, their pain points, and their values. The more you immerse yourself, the better you can reflect their world in your writing. 2. Test Their Attention Span Let’s be honest—attention spans are short, and your audience’s time is precious. Ask yourself, “Would I read this if I were in their shoes?” If the answer is no, then